VMware Workstation and RHEL 6.1 and vmmon and trouble

If you have VMware Workstation and are thinking of upgrading your OS to RHEL (or its clone) 6.1, be prepare to go through some extra steps. VMware WS and EL6.1 won’t work together. 🙁 See, for example, this VMware community forum post: the vmmon.ko module won’t load. Technical details of this issue can be found in this Red Hat bugzilla entry. Apparently, a patch introduced in the EL 6.1 kernel (2.6.32-131.0.15.el6) changed the smp_ops symbol and that prevents the vmmon kernel module from loading.

In VMWare Workstation 7.1.4 build-385536, I see this info with the modinfo command:

vermagic:       2.6.32-71.el6.x86_64 SMP mod_unload modversions

A workaround is to compile the vmmon module on EL 6.1.
Make sure you have kernel-devel installed that matches the running kernel.
Start as a user (not root):

(1) mkdir ~/vmsrc ; cd ~/vmsrc
(2) tar xvf /usr/lib/vmware/modules/source/vmmon.tar
(3) cd vmmon-only
(4) make [Note: this builds vmmon.ko]
(5) strip --strip-debug vmmon.ko [This is optional. Note the two dashes]
(6) su -
(7) cd /lib/modules/`uname -r`/misc
(8) mv vmmon.o vmmon.o.dist [Note: save the original just in case]
(9) cp /(path to user's home)/vmsrc/vmmon-only/vmmon.ko vmmon.o

That should do it!

Hardware virtualization supported but no vmx or svm flag?

One common method to verify that the system has the hardware virtualization extentions (Intel VT or AMD-V) required for full virtualization is to look into /proc/cpuinfo like:

egrep '(vmx|svm)' --color=always /proc/cpuinfo

There was an intriguing post by pjwelsh in the CentOS forums . Apparently he has a VT-capable CPU but it did not show up in /proc/cpuinfo. When he tried Fedora, it was there.

When someone as knowledgeable as pjwelsh reports an issue, it really needs attention but the thread did not yield any answer.

Then more recently, a post that seemingly reports the same problem appeared in the Forums. It was time to do more investigation.

Turns out it was a known issue and there was an entry in the Red Hat bugzilla explaining how that happened.

As work for 5.5 we masked out a bunch more cpuid flags, one of which was vmxe. This has caused some confusion since many people are used to looking in /proc/cpuinfo for vmx in order to detect if the hardware is capable of virtualization. To avoid the confusion, we’ll bring it back. It does, however, open a door for a guest admin to shoot themselves in the foot (i.e. attempt to load the KVM module on a Xen guest, which will crash the guest). The svm flag for AMD machines is also brought back.

Hmmm, seems over-cleaning to me. The fix was applied as of kernel-2.6.18-194.17.1.el5.

SELinux and FreeNX

[Note added in August 2011: Be sure to read the comment by Dan Walsh. There is a simpler solution]

When you attempt to connect to a remote machine using freenx, you might encounter this message:

The NX service is not available or the NX access was disabled on host XXX.

This is likely due to SELinux blocking the connection. If you are using QtNX, it just hangs without any message.  Here is how to solve the issue.

(1) Disable auditd.

service auditd stop

(2) Rename /var/log/audit/audit.log or move it somewhere else.

(3) Enable auditd

service auditd start

(4) Try connection from the client. It will fail. This writes the audit.log file.

(5) Generate SELinux policy rules from the log file and install it.

cat /var/log/audit/audit.log | audit2allow -M freenx
semodule -i freenx.pp

(6) You can see the policy by reading the .te file.

cat freenx.te

module freenx 1.0;

require {
type nx_server_var_lib_t;
type sshd_t;
class file read;
}

#============= sshd_t ==============
allow sshd_t nx_server_var_lib_t:file read;

(7) Now, try connecting from the client again. It will fail again. Repeat the steps (1) to (5) using ‘freenx2’ instead of ‘freenx’.

(8) You will most likely need to repeat the process yet one more time until the connection finally succeeds. So, once again repeat the steps (1) to (5) but this time using ‘freenx3’ instead of ‘freenx’.

If you look at the policy files generated, you will find what was added by each action.

Go green with newer AMD processors

Not long ago, Steve, one of the founders of the ELRepo project, built new systems with the AMD II X4 Phenom processor. After hearing his positive comments, I replaced my old desktop with a new one equipped with a Phenom cpu.

Steve soon noticed that the machine consumed more power when it was running CentOS compared to when running Fedora. Turns out that, in CentOS, there is no per-core control — meaning when the system needs a higher processor power, all cores will shoot up to the maximum frequency. In Fedora, each core gets attenuated independently.

This issue was noted by a CentOS forum user, AlexAT, here. He not only reported it in the upstream bugzilla but came up with a fix later.

Using the patch provided by AlexAT, we built a kernel module kmod-powernow-k8 and released it through ELRepo. After installing kmod-powernow-k8, Steve saw that the system was now measured drawing ~110W at idle from the wall outlet, similar to the power consumption observed under Fedora 10 and under CentOS 4.7. So without kmod-powernow-k8 installed, the system was consuming ~40W (36%) more power at idle and the core temperature was running 8-10°C hotter than with kmod-powernow-k8 installed, making this a very environmentally friendly kmod.

So, if you have newer Opterons, the Phenoms or Phenoms II (or Kuma core Athlons X2), you should give this driver a try. Also, you would want a backported AMD K10 core temperature monitor driver module (kmod-k10temp) from ELRepo.

Let’s go green!

Clean that Inbox

Like many other people, I use Linux as a backup server.  The other day, I noticed that daily incremental backup of one of the Windows machines was well over 1 GB even on the day the user was mostly idle.  The only thing the user was doing was … e-mailing.  Aha! (heard the bell?)  It must be that inflated Inbox.

Mozilla-based mail clients like Thunderbird and Seamonkey mail do not physically remove messages that user deletes.  Instead they are only tagged “deleted”.  This is true even after the Trash folder is emptied.  The [supposedly] deleted mails get [really] deleted when Inbox (or any folder for that matter) is compacted.

I went to the blasted machine and did just that and the Inbox went from > 1 GB to a fraction of its original size.

Of course, this is not just Windows.  Huge mail folders can potentially cause trouble and also degrade the performance of the client.  The best strategy to prevent this is to set up an automatic clean up.  In Thunderbird, go to Edit -> Preferences -> Advanced -> Network & Disk Space and then enable the “Compact folders when it will save over…KB” option.

More about colors – thunderbird

While we are talking about colors …

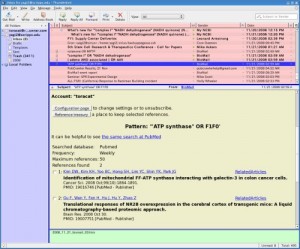
As you know, thunderbird has gobs of options you can play with. I usually do not care much about how it looks and just use the default settings. The only thing I have done was to change the background color of sub-windows.

Thunderbird in color

Thunderbird in color

This was easily done by editing the userChrome.css file in ~/.thunderbird/xxxxxx/chrome/ .

#folderPaneHeader,
#folderTree treecol,
#folderTree
{background-color: #ccf !important;}


#acctCentralGrid
{background-color: #cfc !important;}


#threadTree treecol,
#threadTree
{background-color: #fcc !important;}


#msgHeaderView,
#attachmentList
{background-color: #cfc !important;}


#folderpane_splitter,
#threadpane-splitter,
#attachment-splitter
{background-color: #00d !important;}

Socks proxy with auto-config

OpenSSH has built-in support to act as a SOCKS proxy. In my case, there are web sites I can access only from work computers and I need to get to them from home. So, I issue the command from my home computer:

ssh -D 1080 my work IP

However, I do not want to redirect all traffic through work.  Fortunately, you can redirect only selected URLs fairly easily by using a proxy auto-config file.

In firefox, Go to Edit -> Preferences -> Advanced -> Network -> Settings

In the Connection Settings box, select “Automatic proxy configuration URL:” and enter:
file:///path/to/proxylist.pac
The proxylist.pac file may look like this:

function FindProxyForURL(url, host)
{
// Proxy direct connections to these hosts
if (
shExpMatch(url, "http://www.jbc.com/*") ||
shExpMatch(url, "*.sgmjournals.org/*") ||
shExpMatch(url, "http://www.ncbi.nih.gov/*")
) {
return "SOCKS localhost:1080; DIRECT";
}
// Otherwise go directly
else return "DIRECT";
}

For more details on the pac file and auto config, see
http://en.wikipedia.org/wiki/Proxy_auto-config

sshfs – Remote filesystem access made easy

If you often need to access files on a remote machine and do it by ssh login, there is a handy way – sshfs. Here is a simplified howto that works.

(1) Set up the rpmforge repository if not done yet (see Installing RPMForge )
(2) Either use the dkms-fuse with the stock RHEL/CentOS kernel or use the centosplus kernel that contains the fuse kernel module.

[Note 1: fuse is included in the kernel as of RHEL/CentOS/SL 5.4]
[Note 2: In RHEL/CentOS/SL 6, start with step (4)]

[root@mybox ~]# yum install dkms-fuse && modprobe fuse

(3) Also install the fuse libraries:

[root@mybox ~]# yum install fuse

(4) Then install the fuse-ssh filesystem:

[root@mybox ~]# yum install fuse-sshfs

(5) Add yourself to the group ‘fuse’:

[root@mybox ~]# usermod -a -G fuse user1

(6) Re-logon to your account
(7) Create a local directory:

[user1@mybox ~]$ mkdir remotedir/

(8) To mount (remote username=usr2):

[user1@mybox ~]$ sshfs user2@machine.example.com: remotedir/

(9) To unmount:

[user1@mybox ~]$ fusermount -u remotedir